You can create Permission Policies for your Users and assign these Permission Policies to them. There are two types of Permission Policies you can assign to Users:
- Custom. The policies you create yourself for controlling access to your Organization.
- Managed. System generated policies which you can assign to Users but which you cannot edit to change the access to resources they are configured to allow or deny.
When you create a Custom Permission Policy, you can add statements to the policy that allow or deny actions for specific resources. This allows you to control very precisely what a User who has been given access to your Organization can and cannot do. For example, you might want to create a Permissions Policy that denies Users the ability to retrieve Meters.
This section explains the m3ter permissions model, lists the actions and resources you can use when adding statements to create Permission Policies, and how to create and manage your Custom Permissions Policies:
Warning - Check for Exceptions! There are instances where exceptions to the general permissions framework might occur as a result of shared data. See the Permissions Exceptions section below for more details. Understanding the m3ter Permissions Model
The m3ter Permissions model is implemented using a three-fold framework of Effect, Action, and Resource:
- Def: A Permission is defined as imposing an effect of either allowing or denying access to a specific resource to perform a specific action on that resource.
In JSON format, the general schema for a Permission is:
Resources
Resources are defined as m3ter Resource Identifiers (MRIs) in the format:
service:resource-type/item-type/id
Where:
- service is a distinct part of the overall m3ter system, and which forms a natural functional grouping, such as “config” or “billing”.
- resource-type is the resource type item accessed - for example: “Plan”, “Meter”, “Bill”
- item-type is one of:
- “item” - to specify an individual item.
- “group” - to specify a resource group.
- id is the resource group id or the resource item id
For example:
- To denote as resource a specific Plan with an id = 12345 in the config service, the MRI would be:
config:plan/item/12345
- To denote as resource a Plan Resource Group with id= 987 (that is, applying to all Plans that are contained within the resource group) the MRI would be:
config:plan/group/987
Use of Wildcards for Resources
The use of wildcards when denoting resources is allowed. For example, to denote all Plans as the resource in a permission statement, you can use:
config:plan/*
Tip: Available Resources? Please see the following section for a full list of available resources by service you can use in statements when creating your Permission Policies. Resource Groups
Resources can be assigned to one or more Resource Groups. For example, a Plan can be assigned to Plan Resource Groups, a Meter can be assigned to Meter Resource Groups, and so on. This is useful for cases where you want to create Permission Policies which allow or deny access to a specific subset of resources - you want to grant access to a User to only some of the Plans in your Organization.
This concept of grouping resources applies to every resource in m3ter, including Resource Groups themselves, which allows you to nest resource groups to support hierarchies of groups.
Tip: Creating Resource Groups? You can create Resource Groups, add resource items to them, and manage your Resource Groups using the Resource Groups API calls Actions
Actions define what a User is either allowed or not allowed to do with respect to a resource. For example, you can use a config:create and config:retrieve action to create a statement for a Permission Policy that allows Users to create or retrieve any Plan in your Organization. But if this is the only Permission Policy assigned to a User, they will not be able to update or delete any Plans:
Please see the following section for full details and explanation on using actions against resources when creating statements for your Permission Policies.
Effects and Evaluation Logic
The effect for a Permission Policy is either to allow or to deny:
- Allow - indicates the policy is allowing access to the resource(s) for the given action(s).
- Deny - indicates the policy is denying access to the resource(s) for the given action(s).
If you create a Permission Policy with multiple statements this is how evaluation of access to a resource for a given action is applied:
- There is an implicit denial - the order of evaluation is:
- We check to see if there is a statement that denies access to a resource for a given action. If there is, the access is denied.
- We check to see if there is a statement that allows access to a resource for a given action. If there is, the access is allowed.
- If there is no statement that explicitly denies and no statement that explicitly allows, the access is denied.
- In the case of a conflict of deny/allow, denial takes precedence:
- If there is a statement that denies access to a resource for a given action and there is a statement that allows access to a resource for the same action, the access is denied.
Warning - Check for Exceptions! There are instances where exceptions to the general permissions framework might occur as a result of shared data. See the Permissions Exceptions section below for more details. Permission Policy Statements - Available Actions and Resources
This section lists the actions and resources available for compiling statements you add to your custom Permission Policies.
Statements - Available Actions
When creating statements for Permission Policies, actions always require a resource-type to operate against.
Warning! If you attempt to use a statement when creating a Permission Policy without specifying a resource, then you’ll receive an error message when you attempt to save the policy.
‘*' to indicate all items of the resource-type.
For a config:create action, no resource path is required and we use a wildcard to apply denial of meter creation to all meters:
However, for a config:retrieve action, a resource path is required:
For actions that don’t require a path, paths in associated MRIs will be ignored, and only the resource-type will be used.
You can use the following actions when creating Permission Policy statements:
Which Actions can I use with which Resources?
For the resources listed in the following section, the Actions you can use when creating Permission Policy Statements are determined by Resource type:
- Measurements data:
measurements:retrievemeasurements:uploadmeasurements:fileUpload
- Exports data:
- Other Resource types:
config:createconfig:retrieveconfig:updateconfig:delete
Examples
- Billing Operations. Suppose you want to set up a Permission Policy that you’ll assign to Users of your Organization that belong to the Billing Operations Team. You want them to have full access to work with a specific collection of Bill, Account, AccountPlan, and Bill Statement resources. You can use the four
config actions with the relevant resources to build the required Permission Policy statement:
This means that all members of the Billing Operations Team will have full CRUD access to all resources of the type specified.
Tip: Assign Permissions using a User Group. Note that for this sort of permissions control use case, you can create a Billing Operations User Group, add this Permission Policy to the User Group, and assign each team member to the Group. See Creating and Managing User Groups.
- Measurements Data. For a Permission Policy statement you want to use to define User permissions for the
measurements:data resource, you cannot use any of the config actions. If you want to create a Permission Policy to allow a User full access to work with measurements data, you must use the measurements actions:
Tip: Lower Case! Always use lower case for "action" in your statements. For example, "config:Create" is not a valid expression.
- Data Exports. For a Permission Policy granting Users full working access to create, manage and run data exports, you can create a Permission Policy with two statements. To create and manage data exports:
Statements - Available Resources
You can use the following resources when creating Permission Policy statements:
Creating Custom Permission Policies
In the Settings area of the Console, you can quickly create and mange Custom Permission Policies.
Important: Access to Console! To enable any Users who are assigned Custom Permission Policies to access the m3ter Console, please ensure that one of their Permission Policies includes a Statement that allows them to Retrieve two Resources:
config:organizationConfigbilling:config
Without these permissions Users will be unable to access the Console - see step 9 in the following procedure.
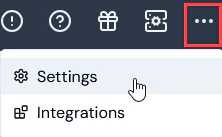
- Select Settings:
 The Organization page opens.
- Select Access settings:
 The Access settings page opens with the Users tab selected.
- Select the Permission policies tab:
- Any system-generated Managed Permission Policies will be listed. You can view this type of Permission Policy and assign them to your Users, but you cannot edit them.
- Any Custom Permission Policies already created for your Organization are also listed and you can view and edit these.
Tip: You can’t view, create, or edit Permission Policies? As a User, you might have been assigned a Permission Policy that denies you view, creation, or edit rights for Permission Policies.
- Select Create permission policy. The Create page opens.
- Under Permission policy details, enter a descriptive Name for the new Permission Policy.
- Under Permission policy statements, you have the option to use either a Simple or Advanced editor to add Statements to the Permission Policy. The Simple editor is selected by default.
- Leave the Simple editor selected. Here’s an example of how to compile Statements using the Advanced editor to allow all actions for all Meters:
- Under Effects, leave the default selection as Allow.
- Under Actions, select the All Config checkbox for Create, Retrieve, Update, and Delete.
- Under Resources, select Selected resources and use the drop-down to select
config.meter:

- Select Advanced if you want to add JSON formatted Statements. The page adjusts again to show a Statements text editor. Here’s an example of how to compile Statements using the Advanced editor to allow all actions for all Meters:

- If you want to add another JSON formatted Statement, select Add. A new Statement text editor window is shown:

Warning - Resource always required! If you attempt to use a statement when creating a Permission Policy without specifying a resource, then you’ll receive an error message when you attempt to save the policy.
Tip: Permission Statement actions and resources? For a full list of the actions and resources you can use when compiling your Permission Policy statements, see the previous section.
- In addition to adding the specific Permission policy statements for a Custom Permission Policy, to ensure any Users who are assigned this as a single Permission Policy you must also add a Statement that enables these Users to access the m3ter Console. This Statement should allow them to Retrieve two Resources:
config:organizationConfigbilling:config
- When you have finished adding all of the required Statements for the Permission Policy, select Create permission policy. The Permission policy details page opens for the new Permission Policy:

- The new Permission Policy is now available for assigning to Users, Service Users, and User Groups that have access to your Organization.
- Select Edit to edit the new policy.
- If you want to delete a Permission Policy, return to the Permission policies tab and select the delete icon for the Policy:
 A confirmation popup appears.
- Select Yes to confirm the delete.
Permissions Exceptions
There are instances where exceptions to the general permissions framework can occur as a result of shared data:
- For example, if a user has been assigned a Permission Policy that denies them access to Products but grants them access to Bills, when they open a Bill, some Product data referenced by the Bill’s line items will be shown for the user.