- Any Aggregations that target a Product Meter also become specific to the same Product and can only be used to price Plans for that Product.
- Product Meters can also be used to collect Product-specific user data you require to serve other business purposes.
- Select Metering. The Meters page opens and lists Meters by Product for All products together with any Global Meters.
- Use the drop-down at top-right to select the Product you want to create the new Meter for. The Meters page adjusts and shows:
- Any existing Meters created for the selected Product at the top of the page.
- Any Global Meters.
- Select Create meter for the Product. The Create page opens:
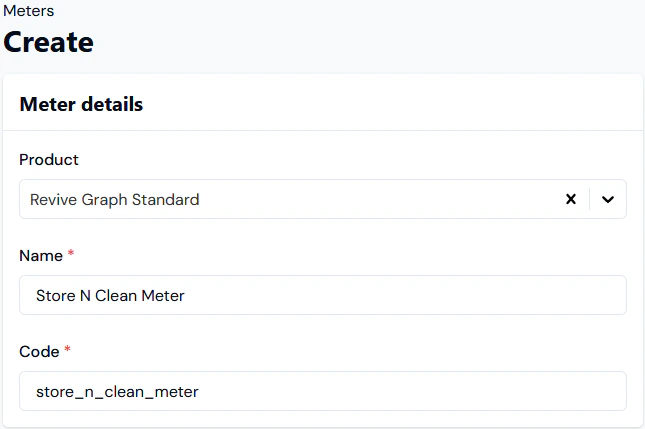
- The Product is pre-selected.
- Alternatively, you can skip Step 2 above to filter for the Product and select Create meter immediately at top-right. If you do this you will then have to select the Product on the Create page when it opens.
- Enter the Meter details:
- Name. Descriptive name for the Meter.
- Code. Unique identifier for the Meter in the m3ter system. You will need this Code as a unique id when submitting API calls, such as a call to update a Meter.
- Notes:
- When you’ve entered a Name and clicked in the Code field, a Code is automatically entered based on the Name. You can then edit the auto-generated Code as required.
- The Code string has a maximum length of 80 characters and must not contain non-printable or whitespace characters (except space), and cannot start/end with whitespace.
- Notes:
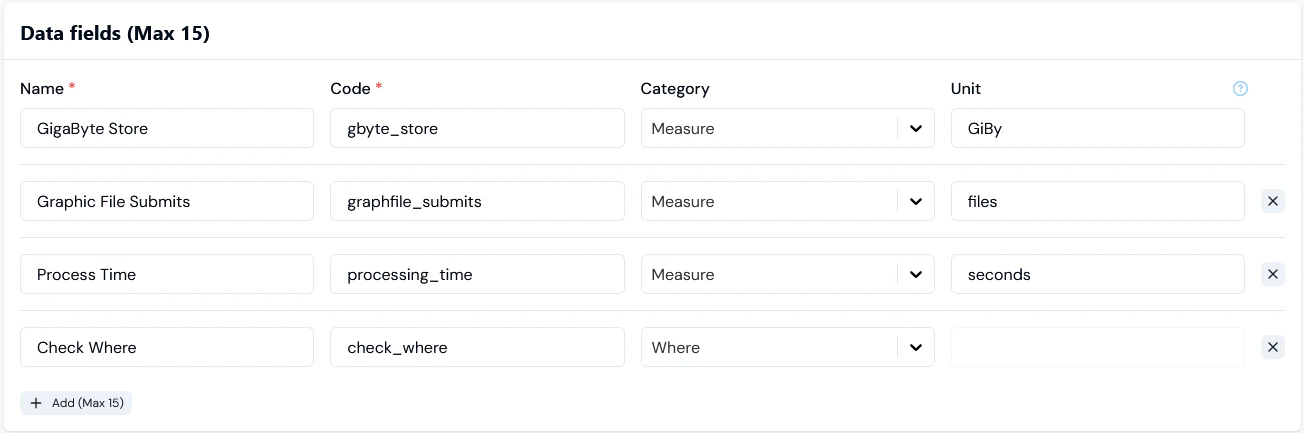
- Add the Data fields you need to collect usage data. For example, a field to collect data on the volume of files stored on your service:
- Name. Descriptive name for the field.
- Code. Unique Identifier for field. You will need this Code as a unique id when submitting API calls, such as a call to submit measurements for this field.
- Notes:
- When you’ve entered a Name and clicked in the Code field, a Code is automatically entered based on the Name. You can then edit the auto-generated Code as required.
- The Code string has a maximum length of 80 characters and can only contain letters, numbers, underscore, and the dollar character, and must not start with a number. The same applies to the Code used for any Derived Fields you add to a Meter - see Step 6 below.
- Notes:
- Category. Defines what type of usage data you want to collect using this field.
- Unit. Defines the unit of measure.
- Add any required Derived fields to the Meter:
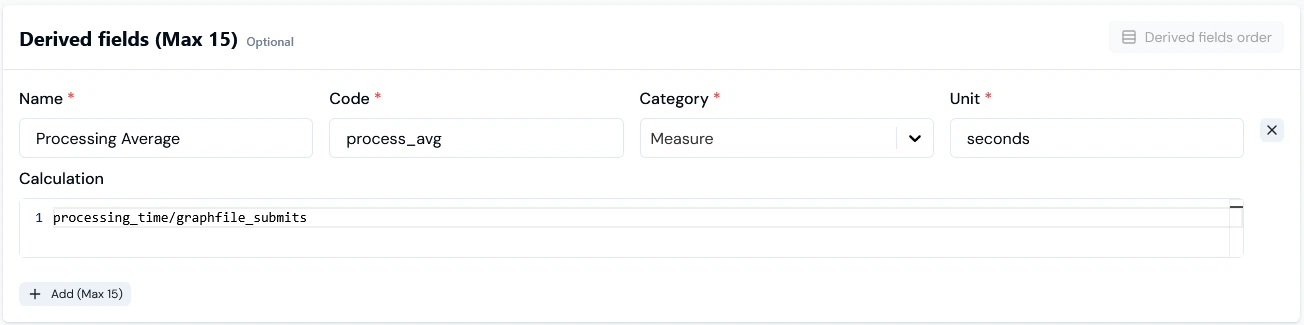
- For more on Derived Fields, see the following topic in this section.
- Add any required Custom fields to the Meter:
- For more on Custom Fields, see Adding and Editing Custom Fields. We strongly recommend reviewing Working with Custom Fields before you create and use Custom Fields.
- Select Create meter. The Meter details page opens:
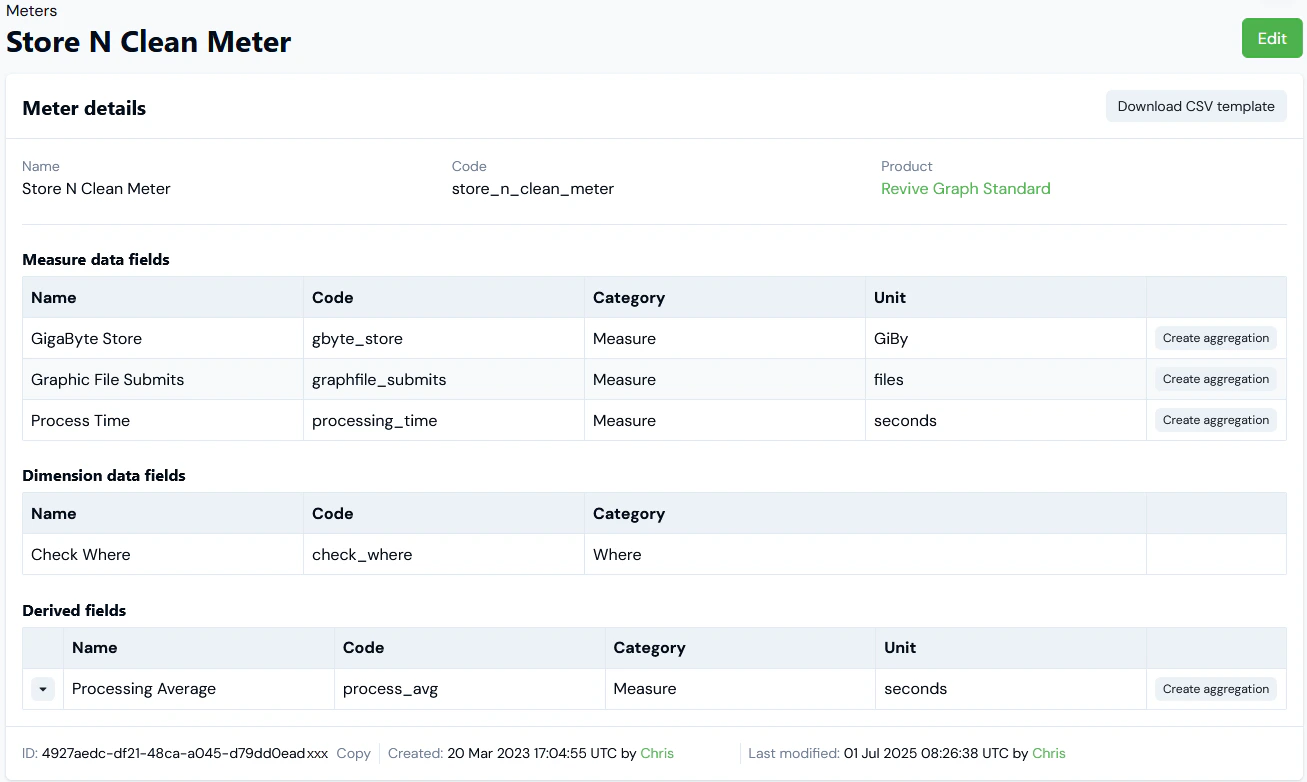
- If you want to create an Aggregation that targets one of the Meter’s Data Fields or Derived Fields, then select Create aggregation for that field:
- You are taken directly to the Aggregations>Create page where the Product is pre-selected and the Meter and Target field under Meter settings are also pre-selected.
- When you complete the Aggregations>Create workflow, you are returned to the Meter details page.
- For more details, see Creating Product Aggregations.
- If you want to edit a Meter’s details, select the Edit button, make your changes, and click Update meter.
- If you want to remove a Meter, return to the Meters page and select the Delete button for the Meter:

- Select Yes to confirm the delete action.