You can create integrations for sending Accounts, Bills, Contracts, Prepayments/Commitments, or Balances data into your Salesforce system. An entity data sync integration allows you to send the operational data held in your m3ter Organization for these entities. You can then use this data for setting up Reports or for supporting other business management tools in your external system.
This topic explains how to set up entity data sync integrations using the example of an Accounts entity data sync integration for Salesforce:
Important! Notes and Warnings:
- Warning: Balance Entity Data Sync! If you set up an entity data sync for Balances, then any Balance Transactions linked to Balances in your m3ter Organization are also sent through to your Salesforce system.
- Note: Accounting Products for Bill integrations? Many line item types can be mapped to specific Accounting Products to serve your revenue recognition and accounting purposes. Where this is the case, the integration will use the assigned Accounting Products.
- Note: Reviewing Integration Runs! When you’ve set up an integration with Salesforce for your Organization in your production environment, you can review details of the integration runs performed for the integration. See Reviewing Integration Run Details.
Tip: m3ter Connector for Salesforce as also available! The m3ter Connector for Salesforce allows you to map and synchronize data in your Salesforce systems with the m3ter platform. See m3ter Connector for Salesforce for more details. Creating the Integration
You can quickly set up an entity data sync integration in the Console. You must complete two stages of configuration when setting up an entity data sync integration:
Global Configuration
You can use Global configuration settings to define which Accounts you want the operational data for the selected entity to be included when the integration runs.
To complete Global configuration for a Salesforce entity data sync integration:
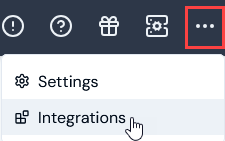
- Select Integrations:
 The Integrations page opens with All selected by default.
- Select Data Sync Integrations. The page adjusts.
- Select Salesforce:
 The Integrations>Salesforce page opens.
- On the Configurations panel, select Configure new integration>Configure account integration:
 The Create page opens and the Entity type - Account and External system - Salesforce are shown at the top of the page.
- Use the Global configuration panel to:
- Enter a Name for the Integration. This is required and is useful if you intend to create multiple Integrations for the same External system/Entity Type and need to clearly differentiate them.
- Select the Accounts you want the integration to apply to:
- Account ids. Select the Accounts you want to include - all selected Accounts are treated as allowed for the integration.
- Restricted account ids. Select the Accounts you want to exclude - all selected Accounts are treated as disallowed for the integration.
Tip: Include all Accounts Data? If you want to include all Accounts in the integration, leave both Accounts ids and Restricted account ids empty.
- Select Users for Email notifications if disabled:
- Integration disabled notification users. Select Organization Users you want to receive an Email notification if the integration is automatically disabled.
Notes:
- An integration is automatically disabled if there have been 20 successive previous error Event responses to earlier attempts to run the integration. See Reviewing and Resolving Integration Events for more details.
- If you select Organization Users to receive an Email notification when the integration is automatically disabled, their User id will be listed under Configuration data on the Integration details page.

- In this example, the Accounts entity data sync integration will include data for all Accounts in the Organization because both Accounts ids and Restricted account ids settings are empty.
- You can now move on to complete External system configuration.
External System Configuration
You can use the external system settings to define the location in your Salesforce Org where the selected entity’s data will be synced to and to specify any entity Custom Fields you want to be included in the integration.
To complete External system configuration for a Salesforce entity data sync integration:
- When you have completed the Global configuration, on the External system configuration panel enter:
- Namespace. This is a required setting for a Salesforce entity data sync integration. Use it to specify the correct location in your Salesforce Org where the entity data will be synced to. Three options:
- Custom Objects. If you don’t have the m3ter Connector managed package installed.
- m3ter Connector. If you have the m3ter Connector managed package installed. Default.
- m3ter Connector (Testing). If you have the m3ter Connector managed package installed as a test install.
- Custom field mappings. If you want custom fields data to be included when the entity data sync integration runs, add mappings for those custom fields set up for the entity in your Organization to Salesforce fields.

- In this example, a single Account custom field mapping has been set up for the integration.
- Select Create integration. You are returned to the Integrations>Salesforce page, where the integration is listed on the Configurations panel:

Setting up Authentication for the Integration
When you’ve created an entity data sync integration, you can select an Integration Credential you’ve created for authentication allowing the integration to connect with your external system.
To set up authentication for your m3ter - entity data sync integration:
- Select Integrations. The Integrations page opens.
- Select Salesforce. The Integrations>Salesforce page opens.
- On the Configurations panel, select the Name hotlink text of the Salesforce integration you want to set up authentication for. The Integration details page opens:
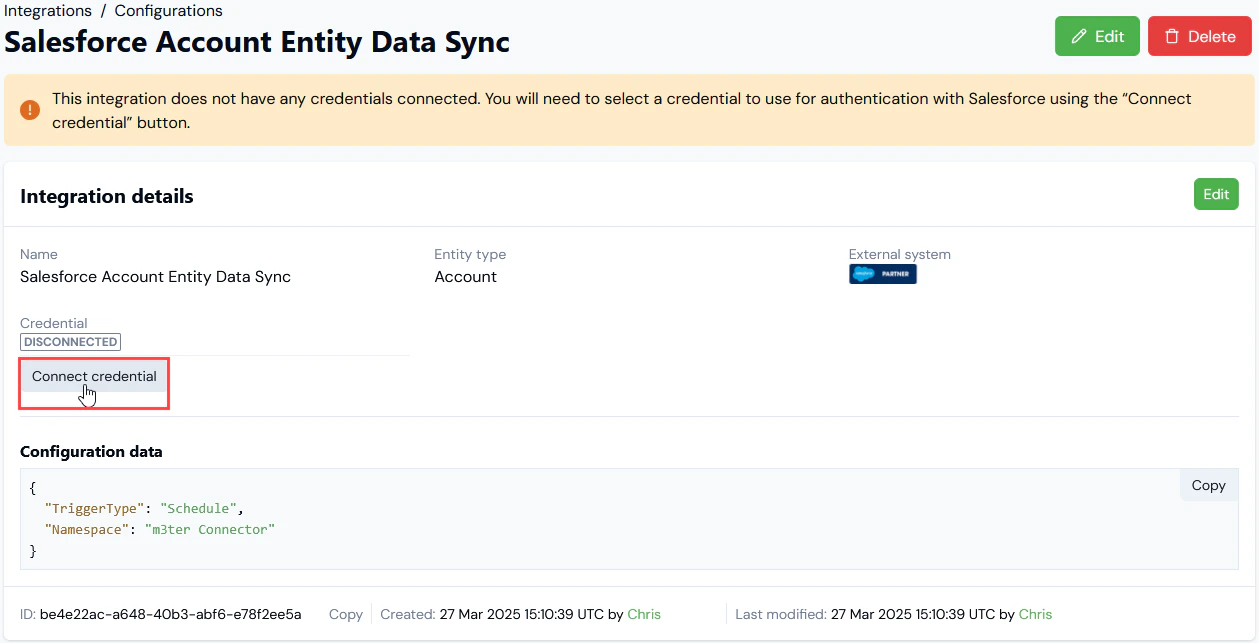
- Notes:
- A warning is shown that the integration is not yet connected to your external system - in this example Salesforce.
- The ID of the integration configuration is shown at the bottom of the Details card, and you can copy the ID directly to your clipboard.
- Select Connect credential. A Select credential modal appears.
- Select a Credential you created earlier and want to use to authenticate the integration with your external system.
- Select Confirm. The modal closes and on Integrations details the integration now shows as CONNECTED:
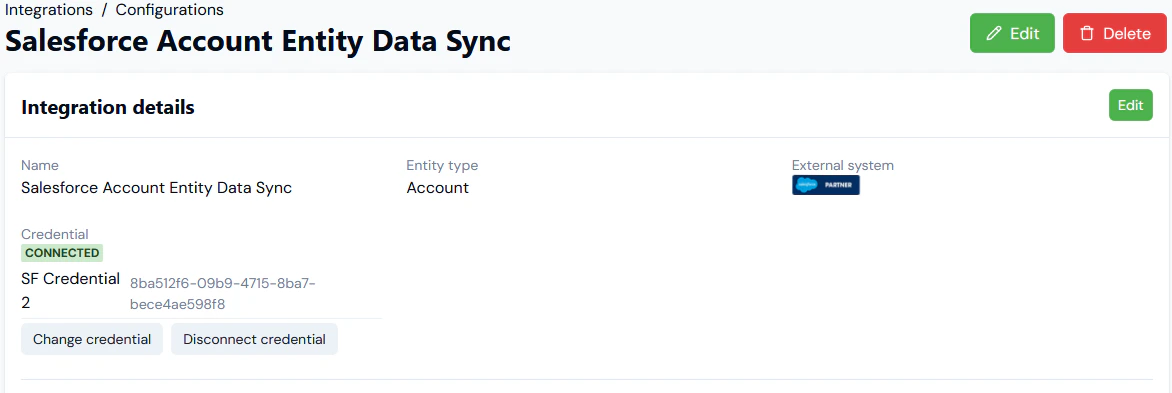
- The Credential used to connect the integration is shown.
- If at any time you want to disconnect the integration, select Disconnect credential.
- If you want to use a different Credential for connecting the integration, select Change credential. The Select credential modal appears and you can select a different Credential.
Notes:
- Testing your Integration Setup? Your Salesforce integration is now available for use. However, it remains in Beta release and we strongly recommend you test the implementation in your m3ter Sandbox or QA environment before releasing it to your Production environment. See section 7. of our Terms of Service for Beta Usage.
- When will the Integration run? The integration will run on hourly basis close to the start of each hour. The schedule for integration runs is not currently configurable.
- Integrations API Calls? When you have set up your Salesforce integration, you can review and manage the integration using a full set of API Calls. See the Integrations section of our API Reference Docs.
Reviewing Entity Data in Salesforce
When the entity data sync integration has run, you can go into your Salesforce Org to review the entity data. For the current example when an Accounts entity data sync has run, you can review the Accounts entity and check that all m3ter Accounts have been synced:
 You can then drill into a specific Account and check details:
