In the Integrations section of the Console, you can create, view, and manage the Credentials for your Organization:
- Integration Configurations. Create the Credentials you’ll need when setting up authentication with external systems for your Integration Configurations.
- Notification Webhook Integrations. When you create an Outgoing webhook and define the M3TER_SIGNED_REQUEST Credentials for authentication with the designated webhook endpoint, you can review the Credential on the Outgoing webhook details page. You can then link a Notification rule to the Outgoing webhook to complete the configuration of the Notification Webhook Integration. See Creating and Managing Outgoing Webhooks.
- m3sh Workflows. If you are using m3sh Workflows, depending on the Workflow type and the functions used in the Workflow, different types of Credentials might be required:
- Incoming Webhook Credentials. m3sh Workflows that use an Incoming Webhook trigger require Incoming Webhook Credentials.
- External System Integration Credentials. API functions in a m3sh Workflow that call an external system can use the integration Credentials you’ve set up for that system.
- m3ter Service User Credentials. API functions in a m3sh Workflow that call the m3ter system can use the Credentials set up for m3ter Service Users. See Service Authentication.
This topic explains how to create integration Credentials, Incoming Webhook Credentials, and how to view and manage your Organization’s Credentials:
Creating Credentials for Integration Configurations
For each type of m3ter integrations available, you can create the Credentials you need to authenticate your integrations with specific external 3rd-party systems. In the Console, there are two ways you can create integration Credentials for external systems:
- Open the Integrations page for the specific external system and create Credentials from there - see the following topics for details:
- Open the Credentials page and create integration Credentials for specific externals systems from there, as follows:
To create integration Credentials:
- Select Integrations:
 The Integrations page opens
- Select Credentials:
 The Credentials page opens.
- Select Create credential. The Create page opens.
- Under Credentials details:
- Enter a Name.
- Use the Destination drop-down to select the external system. The card adjusts for the selected system to allow you to enter the settings required for authenticating with the system:

- In this example of creating a Credential for authenticating with Chargebee, two settings are required:
- Api key. The Api key generated in the Chargebee Console.
- Site. The details of the Chargebee Site to be used as the subdomain when making API Requests
- Select Create credential. You are returned to the Credentials page where the new Credential is listed:
- The Credential is now available for connecting your integrations with the external system - in this example Chargebee.
Creating Incoming Webhook Credentials
m3sh Workflows that use an Incoming Webhook trigger require Incoming Webhook Credentials.
To create Incoming Webhook Credentials:
- Select Integrations. The Integrations page opens.
- Select Credentials:
The Credentials page opens.
- Select Create credential. The Create page opens.
- Under Credentials details:
- Enter a Name.
- Use the Destination drop-down to select m3sh workflow. The card adjusts:

- Five options are available for the Type of Incoming Webhook Credential, and the required settings for each option varies:
- HTTP basic. Enter a Username and Password that matches those configured for the Webhook in the source system. (Default)
- HubSpot client server. Enter a valid Client secret for the HubSpot source.
- m3ter app signature. Enter the Access key id and API secret if the Incoming Webhook requires M3TER_SIGNED_REQUEST authentication.
- Sage Intacct client secret. Enter a valid Client secret for the Sage Intacct source.
- Stripe signed request. Enter a valid Signing key for the Stripe source.
- Select Create credential. You are returned to the Credentials page where the new Credential is listed:
Viewing and Managing Credentials
On the Credentials page in the Integrations section of the Console, you can view and manage all of your Organization’s Credentials. If you only want to view the integration Credentials created for a specific external system, you can do that from the Integrations page for that system:
Viewing and Managing All Credentials
To view all Credentials:
- Select Integrations. The Integrations page opens.
- Select Credentials. The Credentials page open and lists all Credential types created for your Organization:

- You can read-off the Name, Destination, Type, and Created date for each Credential.
- The ID of each Credential is shown and you can Copy this to your clipboard.
- If you want to delete a Credential, select Delete:
 A confirmation dialog appears. Select Yes to confirm the delete action.
NOTE: Editing Credentials? You cannot edit a Credential you’ve created. This is to avoid the need to pass Credential secrets you entered when creating a Credential back up to the Console
Viewing and Managing Integration Credentials
You can open an external system’s Integration page and view Credentials from there.
To view and manage integration Credentials:
- Select Integrations. The Integrations page opens.
- Select the external system you want to view Credentials for:
 The Integrations page for the selected system opens:
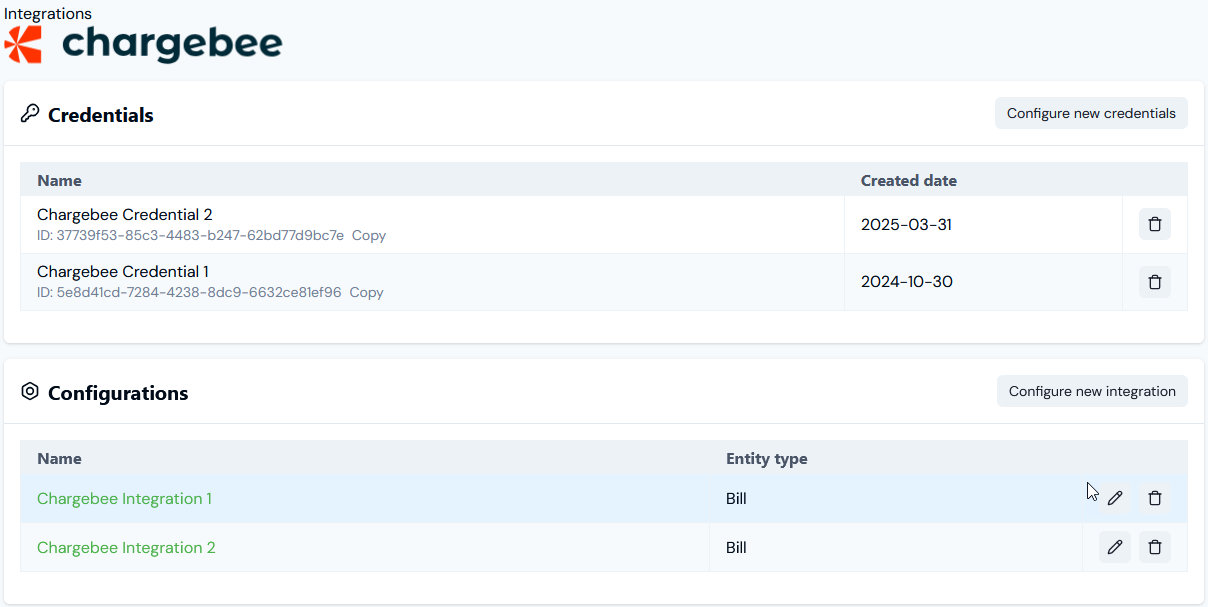
- Any existing Credentials you’ve set up for the external system are listed on the Credentials panel. For each Credential you can.
- Read-off the Name and Created date.
- Check the ID and Copy it to your clipboard.
- Note that if you want to create a new Credential, on the Credentials panel select Configure new credentials. See the relevant topic in this section for creating Credentials for specific external systems - for this example Creating Chargebee Integration Credentials.
- If you want to delete a Credential, select Delete:
A confirmation dialog appears. Select Yes to confirm the delete action.
Note: Editing Credentials? You cannot edit a Credential you’ve set up for an integration. This is to avoid the need to pass Credential secrets you entered when creating a Credential back up to the Console.

